So this is an update from the last update in 2014, but it’s an update. That being said, having taken … 6 … years to finish this project a lot of my thinking is totally lost to me now. Still I’ve made newer bigger coasters and they seem pretty good.
The Coasters
 |
| The original coasters. |
They’ve held up quite well over the years. I took an inventory and a few have a bit of separation between the backing and the beads, but all 8 of the original set get use everyday.
 |
| One of the blue coasters where I use it daily. |
The cupping always bothered me a bit and the size has also been a small problem. So a long time back I figured adding in an extra ring of beads (taking the width from 16 bead x 16 to 18 x 18) would fix the size problem. I’m also hoping that the bigger coasters will also help with cupping, but since that seems to develop over time I don’t have a great answer for that yet.
Pattern
For the pattern I added in an extra ring of the interior colour. That helps actually float the exclamation mark more in the middle so I think overall the bigger sprite makes sense.
 |
| I didn't generate a pattern, but here's the expanded layout. You can see the extra row above the exclamation point) which effectively wraps around the whole coaster. |
To compare here's the original coasters with the completed larger ones:

|

|
 |
| All of the originals with the newer ones behind. |
For each I used the perler colours:
The Black and White are Black (80-19018) and White (80-19001).
Any of the beads where I'm either not sure what bead I used, or what colour the bead is I've marked with a question mark. Those are best guesses.
I also had a bit of an adventure and made a rainbow exclamation mark block. I have a lot of beads kicking around that aren’t really getting used for anything so I thought it would be fun to make up my own.
I didn’t take notes, so I have no idea what colours I actually put in here.
I fused three of these at least a year ago and the other two in the last few days.
For the ones I did in the last few days, I also made some shapes out of the same beads so I had a feeling for how those beads melted. I’ve noticed a bit over time that the different colours have slightly different melting / fusing points.
I also noticed for future reference that depending on how I fuse the beads the depth of the coaster can be pretty different. It doesn’t show so much from the front, but it’s a factor I hadn’t really considered. For the future I’d like to find a way to be more systematic about fusing.
I used the same backing as I did for the original coasters. Which I do mean literally, they’re the same set of sticky felt that I purchased back in 2013 (2012?). So they might not work as well as I’d like. But it’s what I had and given that going out to the craft store is not an option while I’m working, I figured I’d go with what I had.
As it works out the 18 x 18 bead squares are exactly 3 ½ inches wide. So I proceeded to cut a bunch of squares that were *almost* 3 ½ inches square. I have a new cutting mat that’s a little warped still and I guess I just need more practice (and maybe a bit more technique).
I also realized that 3 ½ inches is too wide, because it doesn’t allow for the edge where the beads hang over the backing. I tried to make that a ½ bead overhang and it seems like cutting the squares to be 3 ⅜ inches would have been a better approach. I also had to trim the corners to deal with the curve. I found it was a bit difficult to get a proper trim, so I think if I do more of these it would make sense to have a template or a jig.
So the backs are a little adhoc, despite my best efforts, but they seem to be on comfortably despite all of the potential problems. I’ll use them for a bit and then update to see if the backing actually works, but given how long the smaller coasters have lasted I’m feeling a little optimistic.
These were fun to do. The several times I’ve worked on them over the last (checks notes) half decade, I’ve enjoyed it. Filling in the fields is a very peaceful activity, especially when compared to my Chrono Trigger perler sprites.
Now I’m going to use them for a bit and see how they do. In the mean time I get to mark this project done.
The Red:
| Sprite Colour | Bead Colour |
|---|---|
| Outer Red | Red (80-19005) |
| Inner Red | Magenta (80-19038) |
 |
| Red Coaster - click to enlarge |
The Blue:
| Sprite Colour | Bead Colour |
|---|---|
| Outer Blue | Dark Blue (80-19008) |
| Inner Blue | Turquoise? (80-19062) |
 |
| Blue Coaster - click to enlarge |
The Green:
| Sprite Colour | Bead Colour |
|---|---|
| Outer Green | Dark Green? (80-19010) |
| Inner Green | Green? (80-19080) |
 |
| Green Coaster - click to enlarge |
The Yellow:
| Sprite Colour | Bead Colour |
|---|---|
| Outer Yellow | Cheddar (80-19057) |
| Inner Yellow | Yellow (80-19003) |
 |
| Yellow Coaster - click to enlarge |
Any of the beads where I'm either not sure what bead I used, or what colour the bead is I've marked with a question mark. Those are best guesses.
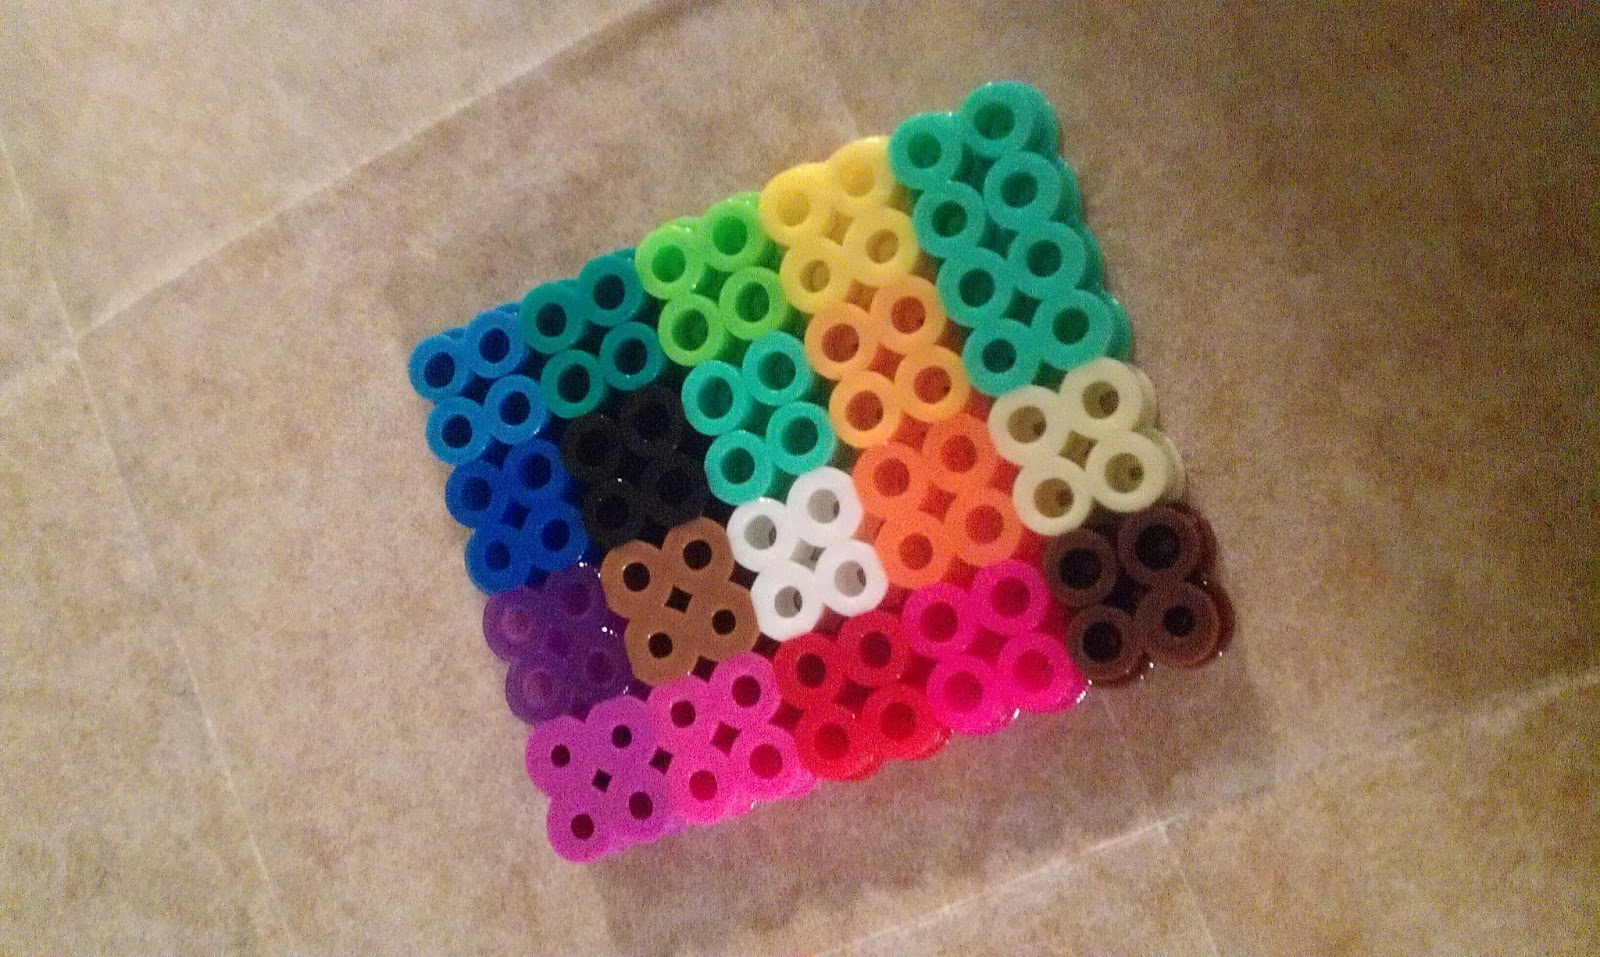
I also had a bit of an adventure and made a rainbow exclamation mark block. I have a lot of beads kicking around that aren’t really getting used for anything so I thought it would be fun to make up my own.
 |
| The Rainbow Wonder. The white ring matches the extra row of beads if you're curious as to size. |
I didn’t take notes, so I have no idea what colours I actually put in here.
Fusing
I fused three of these at least a year ago and the other two in the last few days.
For the ones I did in the last few days, I also made some shapes out of the same beads so I had a feeling for how those beads melted. I’ve noticed a bit over time that the different colours have slightly different melting / fusing points.
 |

|
I also noticed for future reference that depending on how I fuse the beads the depth of the coaster can be pretty different. It doesn’t show so much from the front, but it’s a factor I hadn’t really considered. For the future I’d like to find a way to be more systematic about fusing.
 |
| The different depths of the different coasters. |
Backing
I used the same backing as I did for the original coasters. Which I do mean literally, they’re the same set of sticky felt that I purchased back in 2013 (2012?). So they might not work as well as I’d like. But it’s what I had and given that going out to the craft store is not an option while I’m working, I figured I’d go with what I had.
As it works out the 18 x 18 bead squares are exactly 3 ½ inches wide. So I proceeded to cut a bunch of squares that were *almost* 3 ½ inches square. I have a new cutting mat that’s a little warped still and I guess I just need more practice (and maybe a bit more technique).
 |
| The fit of the red coaster. The cutting matt is a little wonky underneath. |
I also realized that 3 ½ inches is too wide, because it doesn’t allow for the edge where the beads hang over the backing. I tried to make that a ½ bead overhang and it seems like cutting the squares to be 3 ⅜ inches would have been a better approach. I also had to trim the corners to deal with the curve. I found it was a bit difficult to get a proper trim, so I think if I do more of these it would make sense to have a template or a jig.
 |
| The coaster backs. |
So the backs are a little adhoc, despite my best efforts, but they seem to be on comfortably despite all of the potential problems. I’ll use them for a bit and then update to see if the backing actually works, but given how long the smaller coasters have lasted I’m feeling a little optimistic.
 |
| Coaster with the backing on. |
Wrap-up
These were fun to do. The several times I’ve worked on them over the last (checks notes) half decade, I’ve enjoyed it. Filling in the fields is a very peaceful activity, especially when compared to my Chrono Trigger perler sprites.
 |
| The four coasters ready for action. |
Now I’m going to use them for a bit and see how they do. In the mean time I get to mark this project done.
 |
| And now time to relax. |


